Installing Dock Ejector on an Apple silicon Mac
This page includes instructions on how to install OWC Dock Ejector on Apple silicon Macs. You can watch the video or follow the instructions below to complete the installation.
If you have not downloaded Dock Ejector you can download here.
1. Shut down your Mac completely before beginning.
2. After shutting down the system, wait 10 seconds to push and hold down your Mac power button while starting up to get to the startup options.
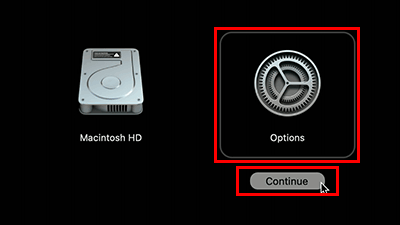
3. Select “Options”, then click “Continue”
.
4. Next, on the menu bar, select “Utilities” and then select “Startup Security Utility”.

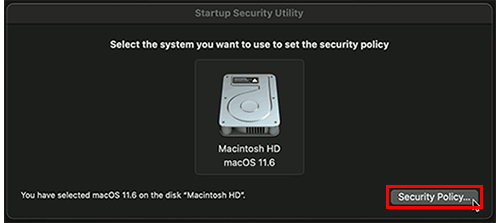
5. Select the startup disk you wish to make changes to, then click on “Security Policy”.
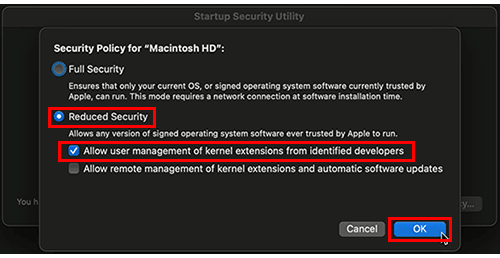
6. Select “Reduced Security,” and “Allow user management of kernel extensions from identified developers” and click “OK”. This will only allow kernel extensions from third-party developers to load if they have been checked for malware by Apple’s malware protection tools during the software build process.
7. Enter the administrator name and password, then click “OK”
.

8. When the settings of the security policy are complete, select “Restart” on the Apple menu to restart your Mac
.

After downloading the latest version of Dock Ejector, please follow the steps below:
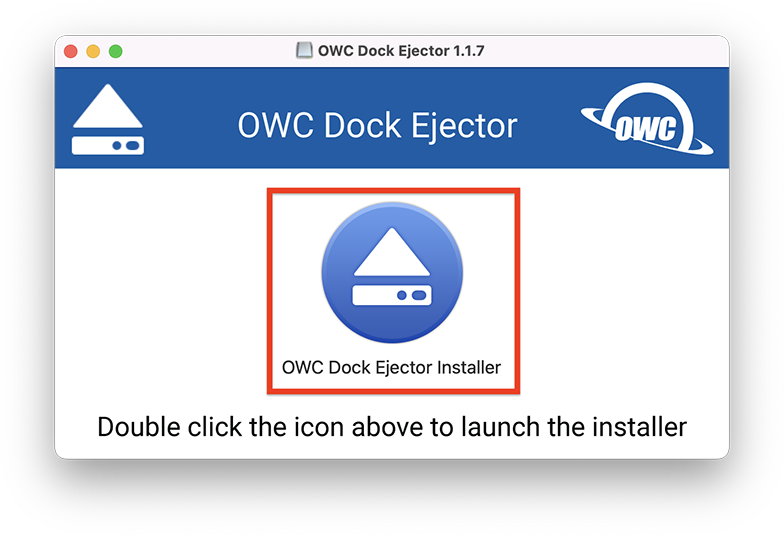
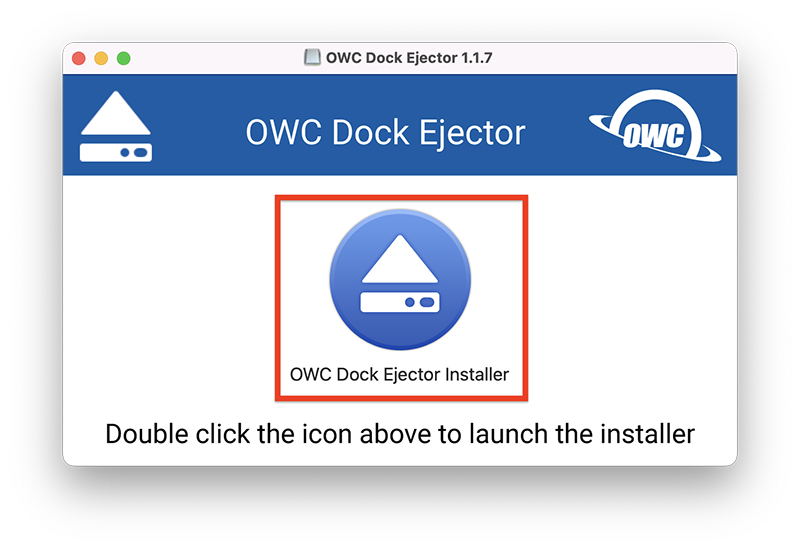
1. Double-click on Dock Ejector icon the launch the installer.
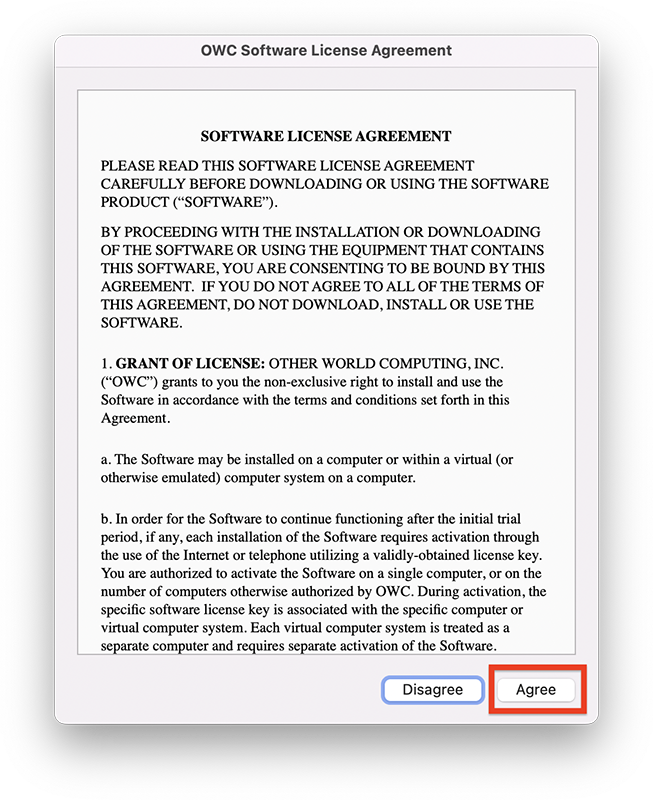
2. Read OWC Software License Agreement and click “Agree”.
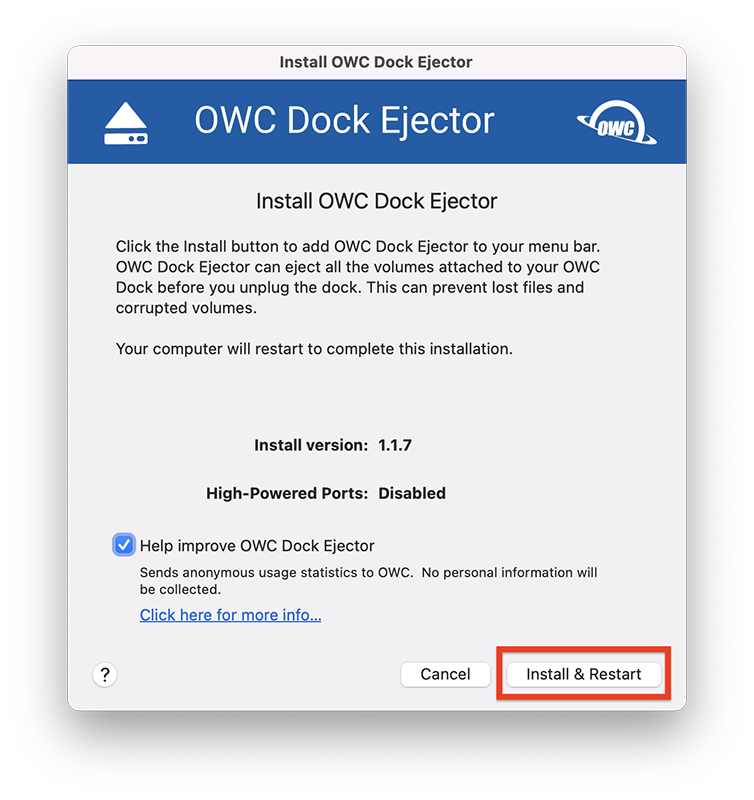
3. Click “Install & Restart” to add Dock Ejector to your menu bar and enter your administrator password.
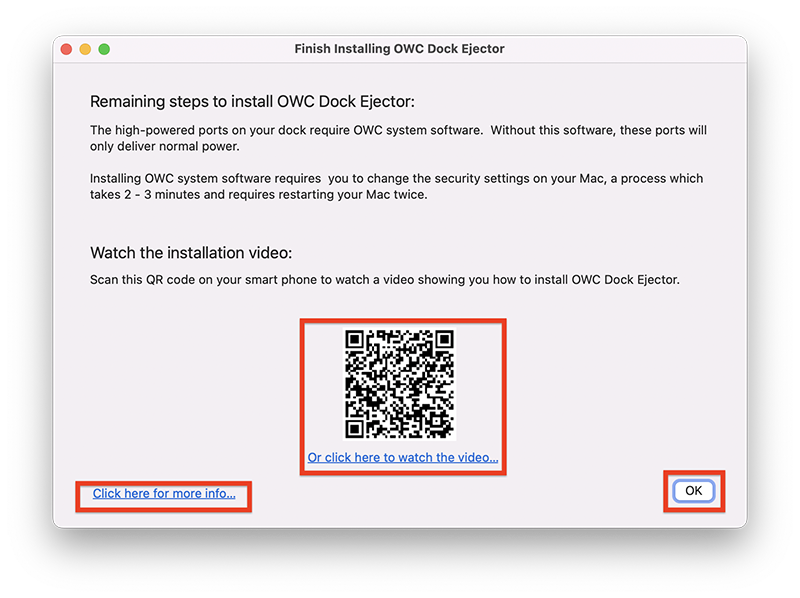
4. For the remaining steps to finish installing Dock Ejector, scan the QR code to watch the video on how to finish installing Dock Ejector or click “OK” and follow the next steps.
For macOS 12 or earlier follow these final steps:
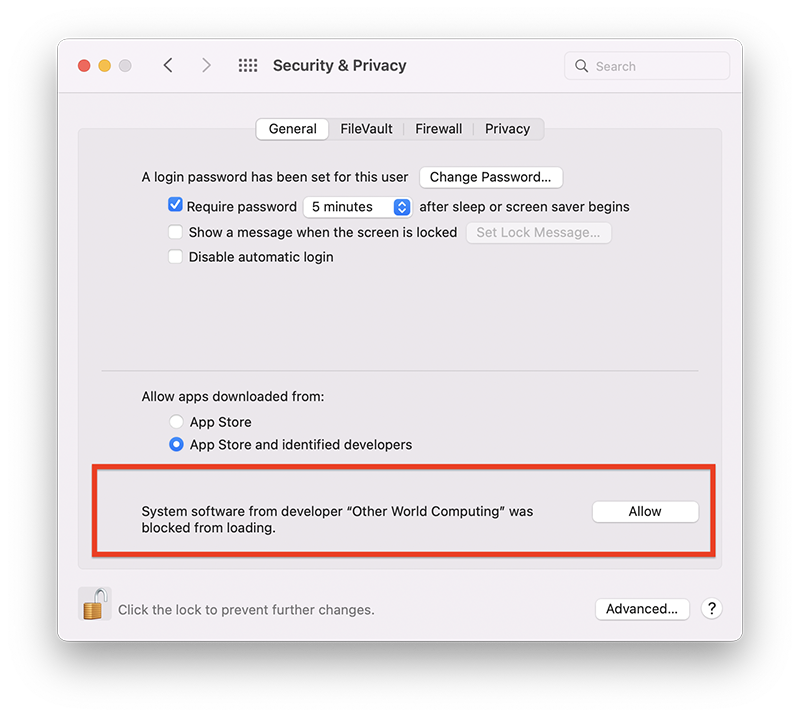
5. Click or navigate to the menu bar to open “System Preferences”.
6. Open the “Privacy and Security” and allow system software from OWC to load.
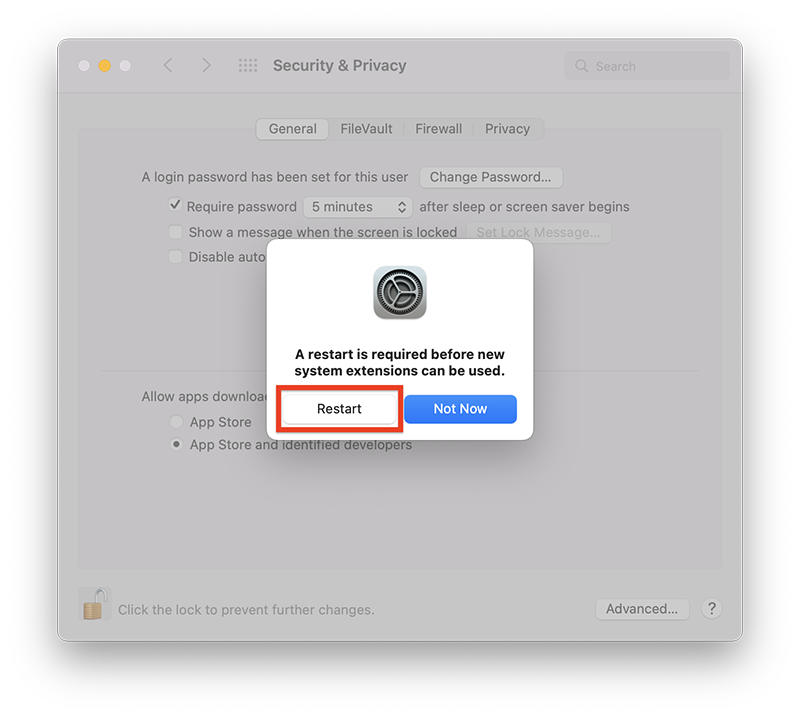
7. Enter your administrator password and click “Restart” for the final step to install Dock Ejector.
For macOS 13 or later follow these final steps:
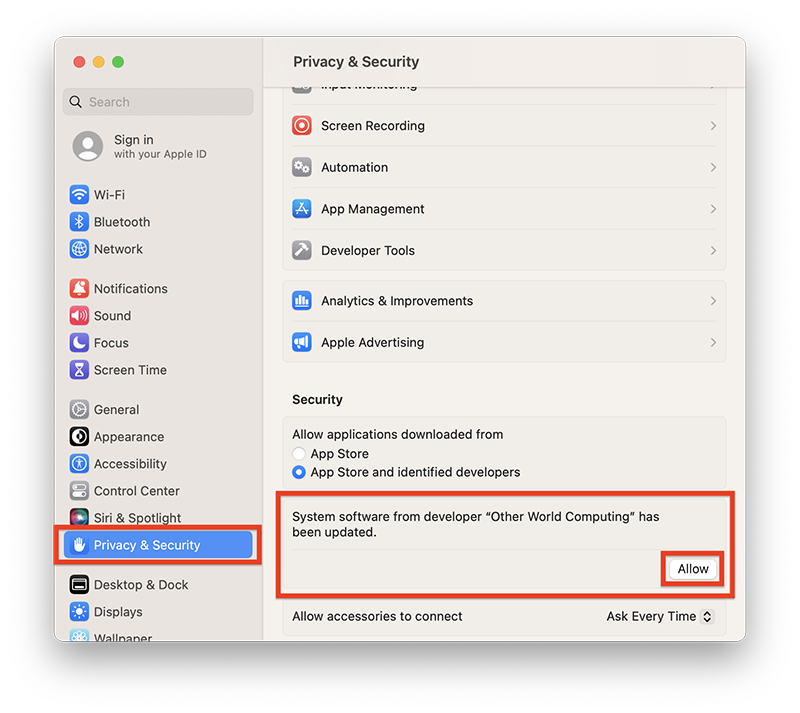
5. Click or navigate to the menu bar to open “System Settings”.
6. Open the “Privacy and Security” section in “System Settings” and scroll down to the “Security” section and allow system software from OWC to update.
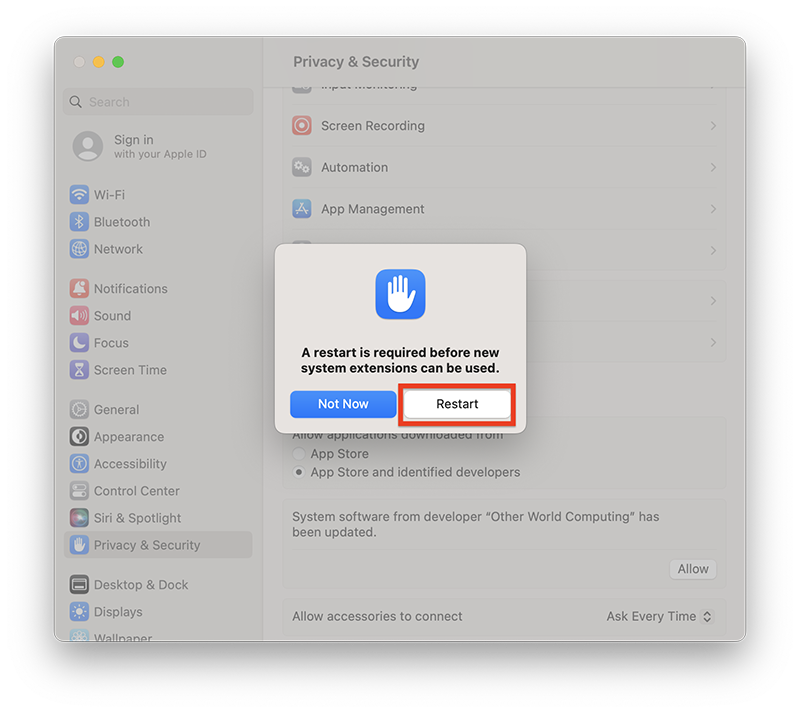
7. Enter your administrator password and restart your computer for the final step to install Dock Ejector
Congratulations, your Mac can now use Dock Ejector to unmount any volumes attached to your OWC USB or Thunderbolt dock.
After downloading the latest version of Dock Ejector, please follow the steps below:
1. Double-click on Dock Ejector icon the launch the installer.
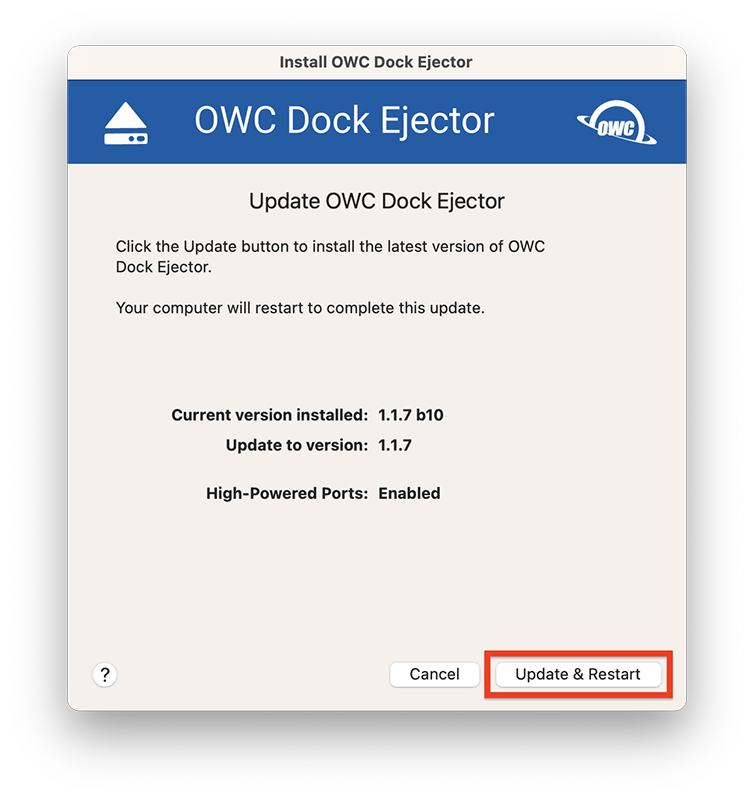
2. Click “Update & Restart” to install the latest version of Dock Ejector.
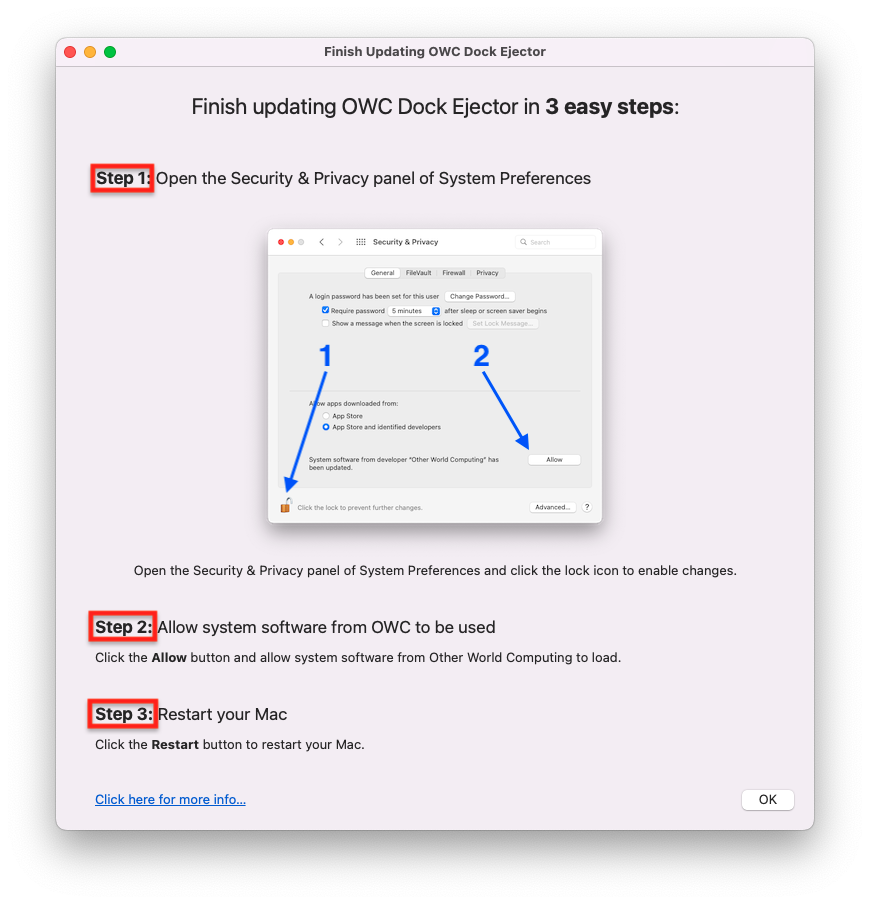
For macOS 12 or earlier, follow these remaining 3 steps to finish updating Dock Ejector:
1. Open the Security & Privacy panel of System Preferences.
2. Allow system software from OWC to be used.
3. Restart your Mac.
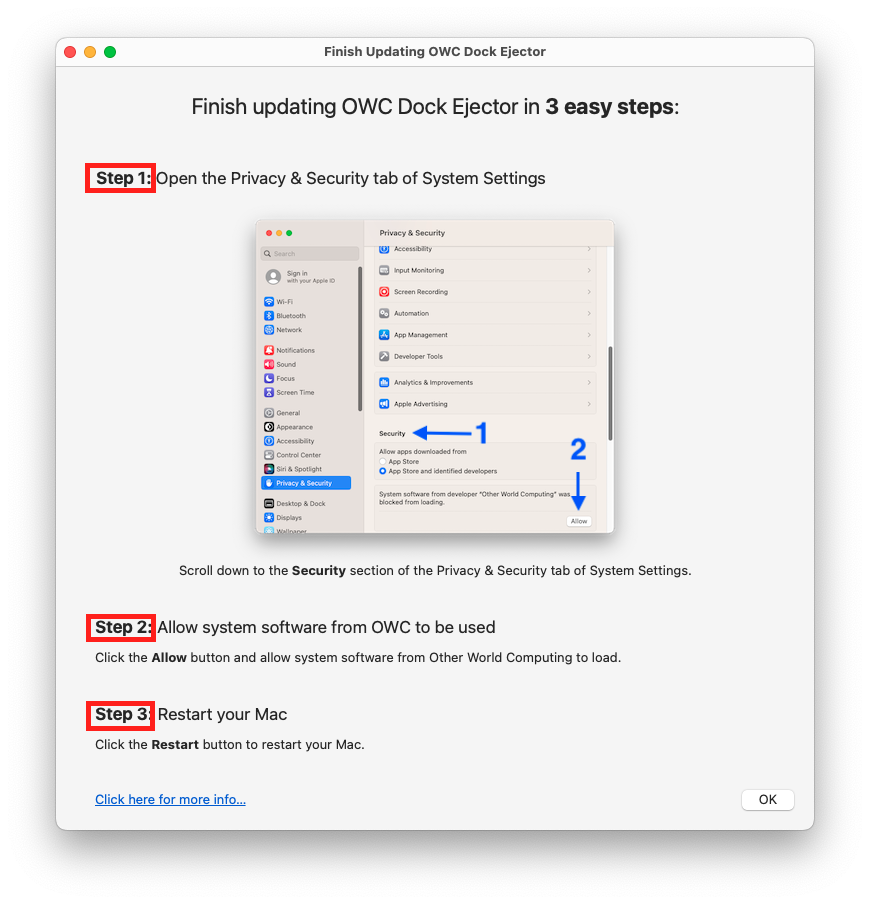
For macOS 13, follow these remaining 3 steps to finish updating Dock Ejector:
1. Open the Privacy & Security tab of System Settings.
2. Scroll down, on the right side of the window, to the section entitled Security.
3. Allow system software from OWC to be used.
4. Restart your Mac