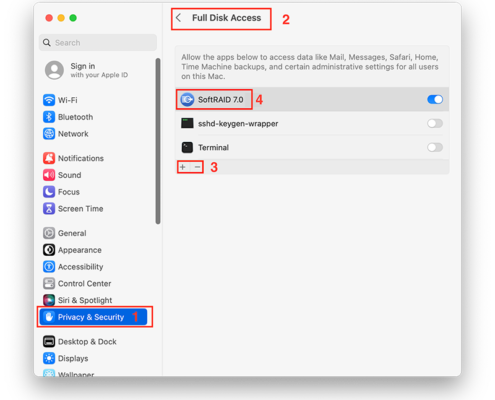
Completing SoftRAID Installation
Remaining installing and updating steps for macOS 12 or earlier
If you are installing SoftRAID on macOS 13, click here
1. Navigate to the menu bar to open “System Preferences”, next open “Security and Privacy”, and allow system software from OWC to load.
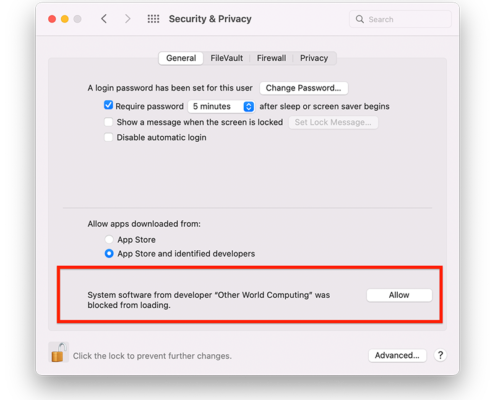
2. Enter your administrator password to allow changes and click “Restart” for the final step to install or update SoftRAID.
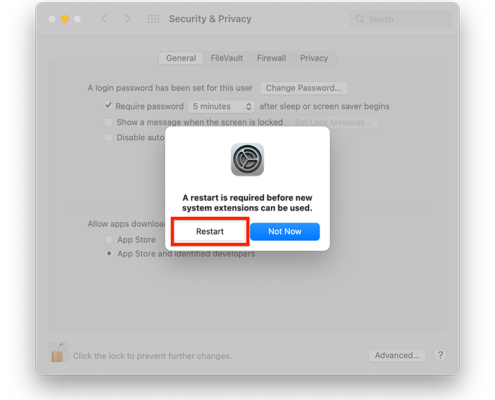
3. After installing SoftRAID, and before launching the software, Full Disk Access will need to be granted. Please complete the following steps:
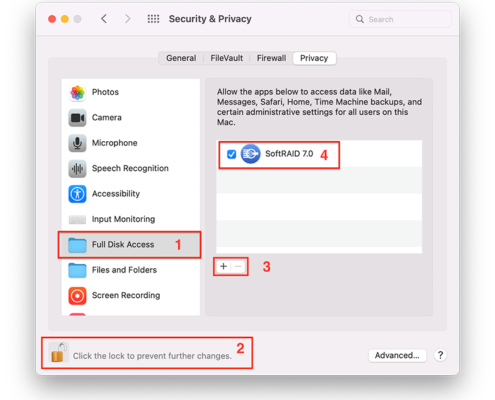
Remaining installing and updating steps for macOS 13:
1. Navigate to the menu bar to open “System Settings”, next open the “Privacy and Security” section in “System Settings” and scroll down to the “Security” section and allow system software from OWC to update.
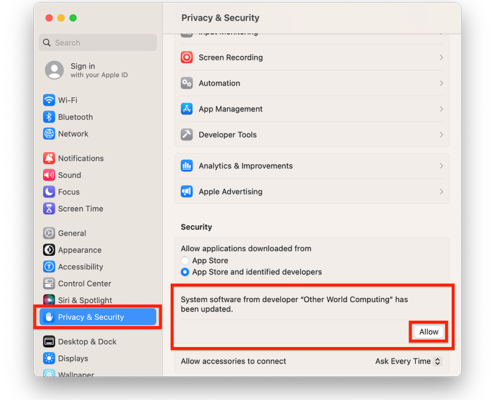
2. Enter your administrator password to allow changes, and click “Restart” for the final step to install or update SoftRAID.

3. After installing SoftRAID, and before launching the software, Full Disk Access will need to be granted. Please complete the following steps:
